7. Add Cluster Schema
To connect to the mysql instance which we just created, we suggest using the freeware MySQL workbench tool, and can be downloaded from https://dev.mysql.com/downloads/workbench/.
- Launch MySQL Workbench tool on your system
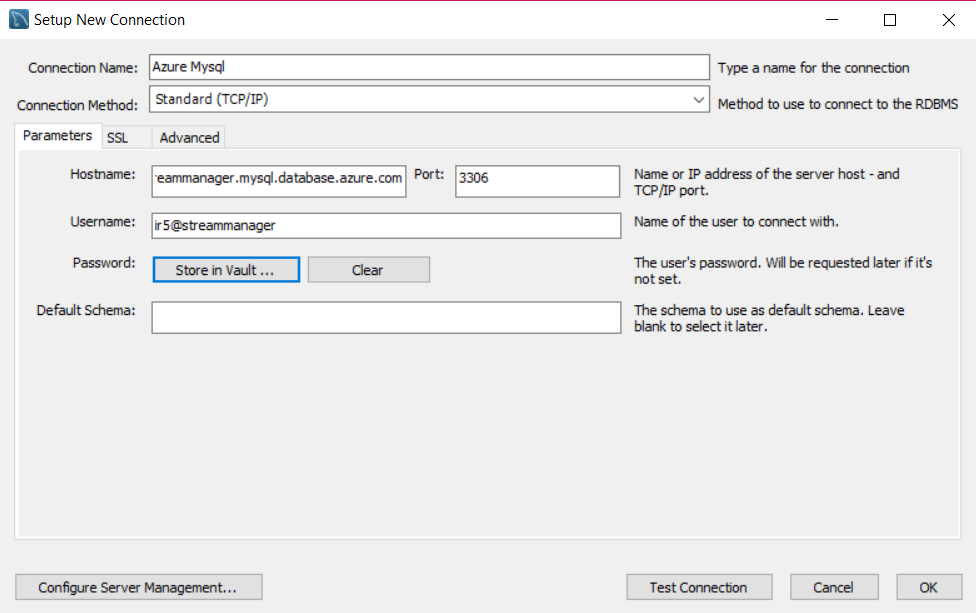
- Click on the “+” icon to the right of MySQL Connections to open the new connection configuration window.
- Enter a connection name – (for example, “azure-mysql”)
- Hostname: the database endpoint URL which we obtained from RDS instance details tab
- Username: the Database Master Username as configured
- Password: the Database Master password as configured
- Default Schema:
Leave blank for now - Click on Test Connection to verify you can connect. : If you have trouble connecting, make sure that the credentials are correct and that your IP address is added in the database firewall settings as described earlier.
- Click “ok” to save configuration and close window.
- Double click on the new connection you created to open database workspace view.
- In the “SCHEMAS” section, right-click and select Create schema to create a new schema.
- Schema Name: type in
clusterand click Apply, then Apply again in the REview the SQL Script popup. - Right-click on the cluster schema and choose “Set as Default Schema”.
- Download the Red5 Pro Server Distribution, and unzip to your desktop.
- Click “ok” to save configuration and close window.
- Download the Red5 Pro Server Distribution, and unzip to your desktop.
- From menu click => File => Open SQL Script, and browse the server distribution to find the
cluster.sqlfile{red5prohome}/webapps/streammanager/WEB-INF/sql/cluster.sql - Make sure that the cluster database is selected, then click the execute icon to execute the sql script which populates the cluster database

